This is a translation of the original article:

It was entirely processed by Claude Opus 5.5 in Claude Code with the Notion MCP.
The RAM Writer is a tool that uses arbitrary code execution to freely read and write the game's memory. This article explains how to install a RAM Writer in the Japanese version of Pokémon Emerald.
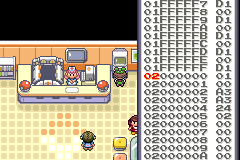
RAM Writer Installation Procedure
Environment
This guide only works with the Japanese version of Pokémon Emerald. It does not work with any non-Japanese version.
Preparation
- A Pomeg Berry (ザロクのみ)
- Can be obtained around the Berry Master's house on Route 123.
Step 1: Prepare the Material Pokémon
The easiest way to obtain a material Pokémon is to use the Seedot (タネボー) named セブン, obtainable by trading a Ralts (ラルトス) in Rustboro City, with its EVs adjusted to 21 HP and 6 Attack. If セブン has not been trained yet, you can adjust it with the following steps. When defeating Pokémon, make sure セブン participates in the battle.
- Use 2 HP Ups.
- Defeat 1 Wurmple (ケムッソ).
- Defeat 6 Poochyena (ポチエナ).
Be careful not to gain EVs from Pokérus or other battles. Do not feed セブン any Pokéblocks (ポロック), and do not use a Pomeg Berry (ザロクのみ) on it.
Preparing the Material with RNG Manipulation
Instead of セブン, you can also use a normal wild Pokémon with a personality value (PID) that satisfies the following conditions.
(PID & 0x40000000) == 0
PID mod 24 is one of 0, 1, 2, 3, 6, 7, 12, 13
Bit 30 being 0 means that the first digit of the 8-digit hexadecimal PID is one of 0, 1, 2, 3, 8, 9, A, or B. This cannot be determined from the nature alone, so check the PID with an RNG tool or similar.
After catching it, set its HP EVs to 21 and its Attack EVs to 6. Defense, Sp. Atk, and Sp. Def EVs are arbitrary. However, be careful of the total EV limit.
If only bit 30 of the PID changes from 0 to 1 and no other data changes, the checksum matches when an even number (0, 2, or 4) of the items in the following table apply. This assumes a Pokémon with a normal held item, moves, and experience, and with the Egg flag and the relevant bits of the unused area set to 0.
| Item | Counted when (value just before corruption) |
|---|---|
| Speed EVs | 64–127 or 192–255 |
| Beauty (うつくしさ) | 64–127 or 192–255 |
| Sheen (けづや) | 64–127 or 192–255 |
| Current PP of the 4th move | 64–127 or 192–255 |
| Ball caught in | Nest (ネスト), Repeat (リピート), Timer (タイマー), Luxury (ゴージャス), or Premier (プレミア) |
For example, if you catch it in a Poké Ball (モンスターボール), do not feed it Pokéblocks (ポロック), keep its Speed EVs at 0–63 or 128–191, and keep the current PP of its 4th move at 0–63, then 0 items apply. If it knows 3 or fewer moves, the current PP of the 4th move is normally 0. Under the same conditions with a Premier Ball (プレミアボール), setting the Speed EVs to 64–127 or 192–255 makes 2 items apply.
Pokémon that have been fed Pokéblocks (ポロック) can also be judged with the conditions in the table. Whether it has a normal held item does not affect this checksum condition.
The original Smart (かしこさ) value is treated as the remaining hatch counter. For a wild Pokémon that has not been fed Pokéblocks (ポロック), it is 0, so the Egg will hatch at the next hatch check. Do not add the resulting Egg to your party until you have set the box names.
Step 2: Obtain the Glitch Pokémon
The following steps use one material Pokémon.
Preparing Your Party and Boxes
Empty Boxes 1, 2, and 12 through 14, and make your party the following 3 Pokémon. The order does not matter, but the 3rd Pokémon must be able to battle.
- A Pokémon whose max HP decreases when a Pomeg Berry (ザロクのみ) is used on it
- To check whether its max HP decreases, save beforehand, use a Pomeg Berry (ザロクのみ), check the result, and then reset.
- A fainted Pokémon
- Any Pokémon (the material Pokémon is fine)
Adjust the current HP of the Pokémon you will use the Pomeg Berry (ザロクのみ) on to 1. One way to do this is to walk around while it is poisoned and use an Antidote (どくけし) once its HP reaches 1. Do not restore its HP after adjusting it.
It is recommended to save before starting the battle so that you can retry if something goes wrong.
Battle and Party Arrangement
- In a battle with a wild Pokémon, send out the 3rd Pokémon in your party and run away without defeating the opponent. If the 3rd Pokémon faints, start over.
- Open the PC and place the material Pokémon in the 24th slot of Box 2.
- Deposit every Pokémon except the one for the Pomeg Berry (ザロクのみ) and the fainted one into Boxes 3 through 11, leaving 2 Pokémon in your party. Do not withdraw any other Pokémon.
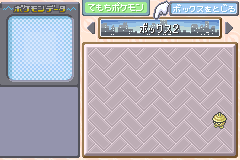
Make sure Box 1 is empty and Box 2 contains only the material Pokémon. Do not fight any other battle from here until the battle in "Pomeg Glitch".
Pomeg Glitch
- Close the PC and use the Pomeg Berry (ザロクのみ) on the Pokémon with 1 HP. It will either faint or have an abnormally large HP value. If the HP becomes abnormal, use a Potion (キズぐすり) to bring it to 0 HP. If the HP stays at 1, reset and start over from your save.
- With every Pokémon in your party at 0 HP, start a battle with a wild Pokémon. A Pokémon that looks like "?" appears.
- Open the SUMMARY (つよさをみる) of the 2nd Pokémon from "POKéMON". Press B to go back, then press B again to close the selection menu.
- With the cursor on the 2nd Pokémon, press Up 3 times (1st Pokémon → CANCEL → out of range). Press it one at a time instead of holding it.
- Press B to return to the battle screen and run away. You may be treated as having blacked out and be sent back to a Pokémon Center.
Checking for Success
Check the 24th slot of Box 2. If you prepared the material Pokémon as in Step 1, the signs of success are as follows:
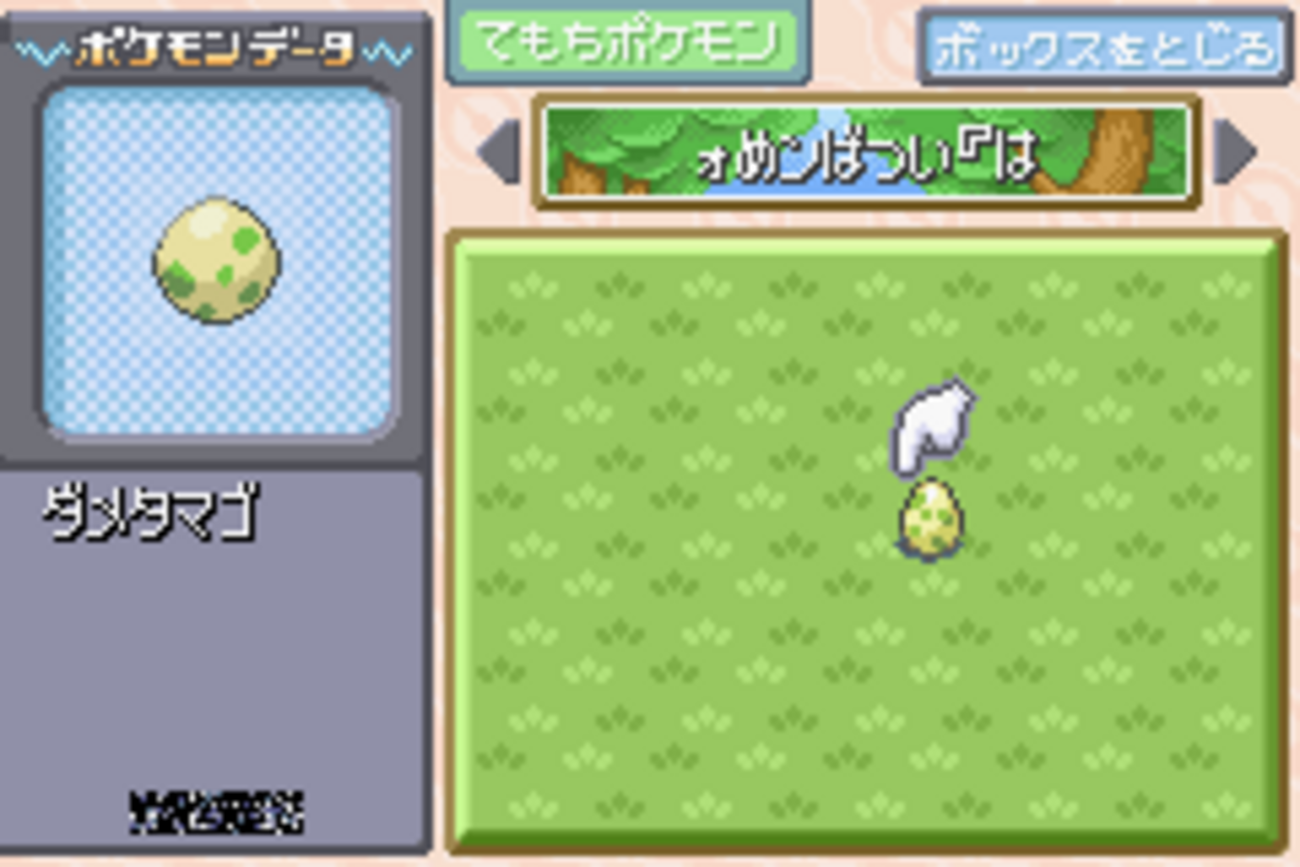
- It has become an "Egg" (タマゴ), not a "Bad Egg" (ダメタマゴ).
- It is in a Nest Ball (ネストボール).
- Its description says that it will hatch soon.
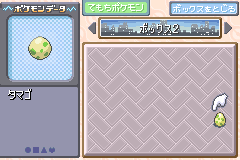
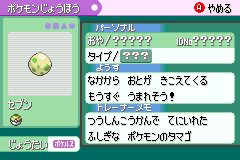
The success rate of this method is 1/32 (about 3.1%).
If it becomes a Bad Egg, the material Pokémon is broken, so reset without saving and start over from your save. If nothing changed, every Pokémon in your party is still at 0 HP, so you can repeat from step 2 of "Pomeg Glitch".
It is recommended to save once you succeed. Even if you make a mistake when entering the box names, you can retry from the state with the Egg. Leave the Egg in the box and proceed to Step 3.
Step 3: Obtain the Glitch Pokémon for Arbitrary Code Execution
This code generates 085F. If you already have 085F, you can skip this step.
Empty the 19th slot of Box 10, the bottom row of Box 11, and Boxes 12 through 14.
Set the names of Boxes 1 through 8 as follows, then hatch the 0615 Egg. You do not need to change the names of Boxes 9 through 14.
Box 1: [さたゼnいみッm]
Box 2: [みめnいみッmち]
Box 3: [ぁmルば4めヂあ]
Box 4: [アグはくぐ l]
Box 5: [いみNミュみ あ]
Box 6: [アそぃギゥ l]
Box 7: [くェあぶみぃ び]
Box 8: [ Wリさく]
After you return to the Pokémon Center you last used, withdraw the 085F generated in the 19th slot of Box 10 into your party.
Step 4: Create the Ursaring for Transfer
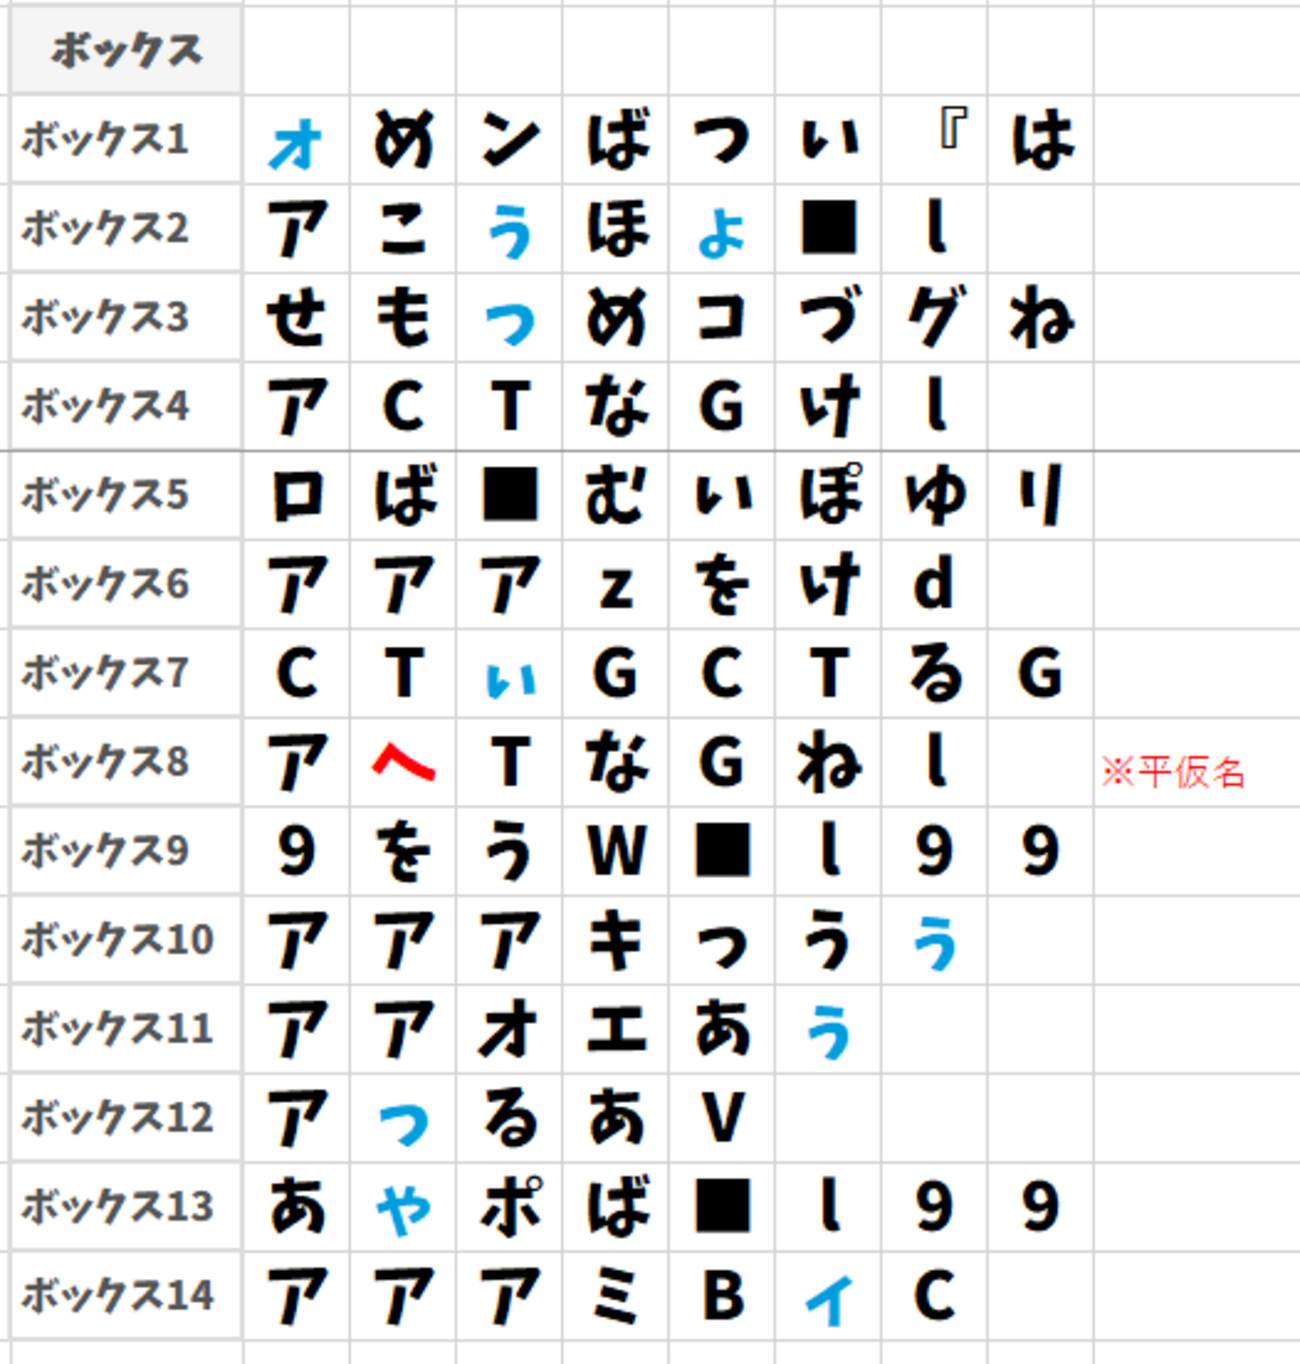
Empty the 16th through 19th slots of Box 1, and set the names of Boxes 1 through 14 as follows.
Box 1:  [ォめンばつい『は]
Box 2:  [アこぅほょ l]
Box 3:  [せもっめコづグね]
Box 4:  [アCTへGけl]
Box 5:  [うぽべはゆリあゃ]
Box 6:  [をさV9をうW]
Box 7:  [CTぃGCTるG]
Box 8:  [アざTざGこl]
Box 9:  [ l99キっうぅ]
Box 10: [アアアオエあぅ]
Box 11: [WsっるあW]
Box 12: [アミBィCzs]
Box 13: [zs  ぺるVビ]
Box 14: [が]
Close the PC and open the SUMMARY (つよさをみる) of the 085F in your party. Once the display settles, close it. An Ursaring is generated in the 16th slot of Box 1.
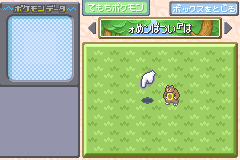
From now on, keep Boxes 12 through 14 empty. Do not change the position, nickname, or held item of the Ursaring or of the 3 Pokémon generated in Step 5, and do not open SUMMARY (つよさをみる).
Step 5: Simplified RAM Writer Setup
Set the names of Boxes 1 through 4 as follows, and do not change them until all 3 transfers are finished.
Box 1:  [ァらぜいっむは3]
Box 2:  [アoひぴざ l]
Box 3:  [めリあゃ みぼづ]
Box 4:  [アボねつはポば]
Set Boxes 5 through 14 starting from the 1st set, and perform the same operation as in Step 4 each time you enter a set.
Set 1: Transfer to the 17th Slot of Box 1
Box 5:  [あF♂あlづゥ ]
Box 6:  [ ぇ」お  よゅ]
Box 7:  [ぴ9oゃァばチl]
Box 8:  [ゃぶぅう!ス l]
Box 9:  [ねぶOねきもぁぴ]
Box 10: [ァばカlうぎ む]
Box 11: [あミろぴゥゃェゃ]
Box 12: [あむァばぴlネざ]
Box 13: [ むァばぶl ら]
Box 14: [おkなぶ リ]
Perform the same operation as in Step 4. Once a Bulbasaur is generated in the 17th slot of Box 1, proceed to the 2nd set.
Set 2: Transfer to the 18th Slot of Box 1
Box 5:  [いいlィィう  ]
Box 6:  [ぞぐ き ゥづゅ]
Box 7:  [V9ぶほくぢぃW]
Box 8:  [えめあげべく l]
Box 9:  [アMよYあれせe]
Box 10: [と2ベシィぐあれ] (katakana ベ)
Box 11: [うh7スぞね7オ]
Box 12: [LsミねIけうろ] (uppercase I)
Box 13: [fXか Fsに ]
Box 14: [いぶあギあぅ]
Perform the same operation as in Step 4. Once a Bulbasaur is generated in the 18th slot of Box 1, proceed to the 3rd set.
Set 3: Transfer to the 19th Slot of Box 1
Box 5:  [ういlあ ぃあ ]
Box 6:  [えグおしWすぴC]
Box 7:  [ゃ9♀ゃあむァば]
Box 8:  [せl んこVかl]
Box 9:  [!にXsusゥァ]
Box 10: [ミゾCsァゥフふ]
Box 11: [ァばうlぇBFC]
Box 12: [ みいめあがDば]
Box 13: [みび♀ホのくのゴ]
Box 14: [ くワふいい]
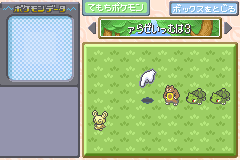
Perform the same operation as in Step 4. The preparation is complete once a Spinda is generated in the 19th slot of Box 1.
Step 6: Start the Simplified RAM Writer
Set the names of Boxes 1 through 14 as follows.
Box 1:  [ァらぜいは3oひ]
Box 2:  [アぴざねぼ l]
Box 3:  [にべにぶあぃくタ]
Box 4:  [アポばアアアアア]
Box 5:  [そべぶネしぼゾぢ]
Box 6:  [つWしぱねリいり]
Box 7:  [せWレぉレぉねリ]
Box 8:  [ りけWクげこタ]
Box 9:  [えべくネくぼィね]
Box 10: [グネくぼグねくび]
Box 11: [ミびFばxコ う]
Box 12: [Kキくくぎせ う]
Box 13: [タも うギ7うい]
Box 14: [ブゅ  おお  ]
Perform the same operation as in Step 4, then close the party screen and the START menu to start the simplified RAM Writer.
Simplified RAM Writer
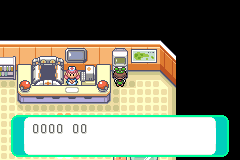
The 4 digits on the left are the input position, and the 2 digits on the right are its value.
B: Input position -01
A: Input position +01
↑: Value -01
↓: Value +01
←: Value -10
→: Value +10
START: Exit
SELECT: Execute code from input position 0000 (be careful not to press this until you have entered the program)
Step 7: RAM Writer Setup
Use the simplified RAM Writer to input the RAM Writer program. Once input is complete, you can start the RAM Writer by pressing the Select button. It is recommended to press the Start button to exit the simplified RAM Writer and save before starting the RAM Writer.
| Input position | Value |
|---|---|
| 0000 | F8 |
| 0001 | B5 |
| 0002 | 4B |
| 0003 | A0 |
| 0004 | 4D |
| 0005 | 4C |
| 0006 | 00 |
| 0007 | F0 |
| 0008 | 1E |
| 0009 | F8 |
| 000A | FF |
| 000B | 28 |
| 000C | 2D |
| 000D | D0 |
| 000E | 50 |
| 000F | 4D |
| 0010 | 28 |
| 0011 | 72 |
| 0012 | 11 |
| 0013 | 21 |
| 0014 | 4A |
| 0015 | 4C |
| 0016 | 00 |
| 0017 | F0 |
| 0018 | 16 |
| 0019 | F8 |
| 001A | 45 |
| 001B | A0 |
| 001C | 52 |
| 001D | A2 |
| 001E | 04 |
| 001F | 23 |
| 0020 | 00 |
| 0021 | F0 |
| 0022 | 09 |
| 0023 | F8 |
| 0024 | 08 |
| 0025 | 30 |
| 0026 | 0C |
| 0027 | 23 |
| 0028 | 00 |
| 0029 | F0 |
| 002A | 05 |
| 002B | F8 |
| 002C | 02 |
| 002D | 20 |
| 002E | 00 |
| 002F | 06 |
| 0030 | 68 |
| 0031 | 71 |
| 0032 | 28 |
| 0033 | 60 |
| 0034 | 44 |
| 0035 | E0 |
| 0036 | 00 |
| 0037 | 21 |
| 0038 | 07 |
| 0039 | B5 |
| 003A | 28 |
| 003B | 7A |
| 003C | 00 |
| 003D | 22 |
| 003E | 41 |
| 003F | 4C |
| 0040 | 00 |
| 0041 | F0 |
| 0042 | 01 |
| 0043 | F8 |
| 0044 | 07 |
| 0045 | BD |
| 0046 | 20 |
| 0047 | 47 |
| 0048 | 05 |
| 0049 | DF |
| 004A | 3F |
| 004B | 4C |
| 004C | FF |
| 004D | F7 |
| 004E | FB |
| 004F | FF |
| 0050 | 3E |
| 0051 | 4B |
| 0052 | 1B |
| 0053 | 88 |
| 0054 | 19 |
| 0055 | 07 |
| 0056 | 09 |
| 0057 | D5 |
| 0058 | 28 |
| 0059 | 7A |
| 005A | 41 |
| 005B | 4C |
| 005C | FF |
| 005D | F7 |
| 005E | F3 |
| 005F | FF |
| 0060 | 00 |
| 0061 | 20 |
| 0062 | 40 |
| 0063 | 4C |
| 0064 | FF |
| 0065 | F7 |
| 0066 | EF |
| 0067 | FF |
| 0068 | 00 |
| 0069 | 20 |
| 006A | F8 |
| 006B | BD |
| 006C | 6F |
| 006D | 79 |
| 006E | E8 |
| 006F | 79 |
| 0070 | 39 |
| 0071 | 1F |
| 0072 | 01 |
| 0073 | D0 |
| 0074 | 28 |
| 0075 | 68 |
| 0076 | 79 |
| 0077 | 1C |
| 0078 | 04 |
| 0079 | 2B |
| 007A | 07 |
| 007B | D8 |
| 007C | 00 |
| 007D | 2B |
| 007E | 1C |
| 007F | D0 |
| 0080 | E9 |
| 0081 | 79 |
| 0082 | 28 |
| 0083 | 68 |
| 0084 | 01 |
| 0085 | 70 |
| 0086 | 99 |
| 0087 | 08 |
| 0088 | 40 |
| 0089 | 18 |
| 008A | 18 |
| 008B | E0 |
| 008C | 20 |
| 008D | 2B |
| 008E | 08 |
| 008F | D8 |
| 0090 | 02 |
| 0091 | D0 |
| 0092 | 38 |
| 0093 | 1F |
| 0094 | 03 |
| 0095 | D0 |
| 0096 | 01 |
| 0097 | E0 |
| 0098 | 78 |
| 0099 | 1E |
| 009A | 00 |
| 009B | D5 |
| 009C | 05 |
| 009D | 30 |
| 009E | 68 |
| 009F | 71 |
| 00A0 | 10 |
| 00A1 | E0 |
| 00A2 | C9 |
| 00A3 | 00 |
| 00A4 | 01 |
| 00A5 | 22 |
| 00A6 | CA |
| 00A7 | 41 |
| 00A8 | 19 |
| 00A9 | 0A |
| 00AA | 02 |
| 00AB | D0 |
| 00AC | 12 |
| 00AD | 01 |
| 00AE | 02 |
| 00AF | 29 |
| 00B0 | 01 |
| 00B1 | D0 |
| 00B2 | 40 |
| 00B3 | 2B |
| 00B4 | 00 |
| 00B5 | D1 |
| 00B6 | 52 |
| 00B7 | 42 |
| 00B8 | 80 |
| 00B9 | 18 |
| 00BA | 04 |
| 00BB | 2F |
| 00BC | 01 |
| 00BD | D0 |
| 00BE | 28 |
| 00BF | 60 |
| 00C0 | 00 |
| 00C1 | 78 |
| 00C2 | E8 |
| 00C3 | 71 |
| 00C4 | 24 |
| 00C5 | 49 |
| 00C6 | 8C |
| 00C7 | 1C |
| 00C8 | 24 |
| 00C9 | 4B |
| 00CA | 22 |
| 00CB | 48 |
| 00CC | 86 |
| 00CD | 1C |
| 00CE | 15 |
| 00CF | 22 |
| 00D0 | 01 |
| 00D1 | 80 |
| 00D2 | 04 |
| 00D3 | 83 |
| 00D4 | 43 |
| 00D5 | 82 |
| 00D6 | 40 |
| 00D7 | 30 |
| 00D8 | 01 |
| 00D9 | 3A |
| 00DA | F9 |
| 00DB | D1 |
| 00DC | 14 |
| 00DD | 27 |
| 00DE | 2B |
| 00DF | 68 |
| 00E0 | D8 |
| 00E1 | 1B |
| 00E2 | 0B |
| 00E3 | 30 |
| 00E4 | 6B |
| 00E5 | 79 |
| 00E6 | 03 |
| 00E7 | 21 |
| 00E8 | 4B |
| 00E9 | 40 |
| 00EA | 0B |
| 00EB | 2F |
| 00EC | 00 |
| 00ED | D0 |
| 00EE | 06 |
| 00EF | 23 |
| 00F0 | 1C |
| 00F1 | 24 |
| 00F2 | 00 |
| 00F3 | F0 |
| 00F4 | 0D |
| 00F5 | F8 |
| 00F6 | 02 |
| 00F7 | 36 |
| 00F8 | 00 |
| 00F9 | 78 |
| 00FA | 0B |
| 00FB | 2F |
| 00FC | 00 |
| 00FD | D1 |
| 00FE | E8 |
| 00FF | 79 |
| 0100 | 07 |
| 0101 | 3B |
| 0102 | 04 |
| 0103 | 24 |
| 0104 | 00 |
| 0105 | F0 |
| 0106 | 04 |
| 0107 | F8 |
| 0108 | 2A |
| 0109 | 36 |
| 010A | 01 |
| 010B | 3F |
| 010C | E7 |
| 010D | D1 |
| 010E | 9B |
| 010F | E7 |
| 0110 | 01 |
| 0111 | 00 |
| 0112 | E1 |
| 0113 | 40 |
| 0114 | 09 |
| 0115 | 07 |
| 0116 | 09 |
| 0117 | 0F |
| 0118 | E2 |
| 0119 | 08 |
| 011A | 9A |
| 011B | 42 |
| 011C | 00 |
| 011D | D1 |
| 011E | 11 |
| 011F | 31 |
| 0120 | 0E |
| 0121 | 4A |
| 0122 | 51 |
| 0123 | 18 |
| 0124 | 01 |
| 0125 | 31 |
| 0126 | 31 |
| 0127 | 80 |
| 0128 | 02 |
| 0129 | 36 |
| 012A | 04 |
| 012B | 3C |
| 012C | F0 |
| 012D | D5 |
| 012E | 70 |
| 012F | 47 |
| 0130 | 00 |
| 0131 | 02 |
| 0132 | 03 |
| 0133 | 11 |
| 0134 | 03 |
| 0135 | 0F |
| 0136 | 8F |
| 0137 | 00 |
| 0138 | 00 |
| 0139 | 04 |
| 013A | 05 |
| 013B | 00 |
| 013C | 51 |
| 013D | 32 |
| 013E | 00 |
| 013F | 08 |
| 0140 | 19 |
| 0141 | 3B |
| 0142 | 00 |
| 0143 | 08 |
| 0144 | FD |
| 0145 | 9A |
| 0146 | 19 |
| 0147 | 08 |
| 0148 | E5 |
| 0149 | 05 |
| 014A | 00 |
| 014B | 08 |
| 014C | 90 |
| 014D | 23 |
| 014E | 00 |
| 014F | 03 |
| 0150 | 00 |
| 0151 | D6 |
| 0152 | 03 |
| 0153 | 02 |
| 0154 | 22 |
| 0155 | F8 |
| 0156 | 00 |
| 0157 | 06 |
| 0158 | 17 |
| 0159 | E2 |
| 015A | 00 |
| 015B | 00 |
| 015C | 9F |
| 015D | F0 |
| 015E | 00 |
| 015F | 00 |
| 0160 | 45 |
| 0161 | 34 |
| 0162 | 00 |
| 0163 | 08 |
| 0164 | 49 |
| 0165 | 22 |
| 0166 | 00 |
| 0167 | 08 |
| 0168 | A1 |
| 0169 | A2 |
| 016A | A3 |
| 016B | A4 |
| 016C | A5 |
| 016D | A6 |
| 016E | A7 |
| 016F | A8 |
| 0170 | A9 |
| 0171 | AA |
| 0172 | BB |
| 0173 | BC |
| 0174 | BD |
| 0175 | BE |
| 0176 | BF |
| 0177 | C0 |
| 0178 | FF |
| 0179 | 00 |
| 017A | 00 |
| 017B | 00 |
| 017C | 00 |
| 017D | 00 |
| 017E | 00 |
| 017F | 00 |
RAM Writer
From now on, you can start the RAM Writer each time you start the simplified RAM Writer and press the Select button.
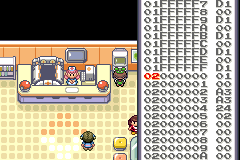
The 8 digits on the left are the memory address, and the 2 digits on the right are its value. Select the 2 digits shown in red with Left and Right, and change them with Up, Down, L, and R.
←: Move the selection left
→: Move the selection right
↑: Selected 2 digits -01
↓: Selected 2 digits +01
L: Selected 2 digits -10
R: Selected 2 digits +10
A: Write the displayed value to the current address
B: Write the displayed value to the current address
SELECT: Write the value and advance the address by +01
START: Exit and return to the game
Starting the Full Version Directly
Change the names of both Box 10 and Box 14 to the following.
Box 10: [けネくぼグねくび]
Box 14: [ブゅ  ベゅ  ] (katakana ベ)
Perform the same operation as in Step 4, then close the party screen and the START menu to start the full version of the RAM Writer directly.
Advanced: Rewriting the Box Names with the Full Version
This method uses the full version to rewrite 3 bytes and change the box names to the ones for starting it directly.
Read the 4 bytes starting at 03005AF4 and reverse their order to get the start address of the box data.
For example, if 00 98 02 02 is displayed, the start address is 02029800. Add the values in the table below to the start address in hexadecimal to get the addresses to rewrite.
| Part to rewrite | Value to add | Before | After |
|---|---|---|---|
| 1st character of Box 10 | 00008395 | 89 | 09 |
| 5th character of Box 14 | 000083BD | 05 | 99 |
| 6th character of Box 14 | 000083BE | 05 | 35 |
If the start address is 02029800, the addresses are as follows.
| Part to rewrite | Calculation | Address to rewrite |
|---|---|---|
| 1st character of Box 10 | 02029800 + 00008395 | 02031B95 |
| 5th character of Box 14 | 02029800 + 000083BD | 02031BBD |
| 6th character of Box 14 | 02029800 + 000083BE | 02031BBE |
The start address changes when you open menus, enter or leave the PC, or restart the game, so read it again every time. Check that all 3 calculated addresses match the "Before" values, then write the "After" values one at a time with A or B. If they do not match, do not change anything.
Perform the same operation as in Step 4, then close the party screen and the START menu to start the full version of the RAM Writer directly.
References
For the arbitrary code execution procedure, the following are referenced.


For the RAM Writer, the following are referenced.