This is a translation of the original article:
📄  ポケットモンスター ファイアレッド・リーフグリーン バイナリエディタ
It was entirely processed by Claude Opus 5.5 in Claude Code with the Notion MCP.
The RAM Writer is a tool that uses arbitrary code execution to freely read and write the game's memory. This article explains how to install a RAM Writer in the Japanese versions of Pokémon FireRed and LeafGreen.
RAM Writer Installation Procedure
Environment
This guide only works with the Japanese versions of Pokémon FireRed and LeafGreen. It does not work with any non-Japanese version. Both the GBA versions and the Switch versions are supported.
Version Differences
The GBA versions of Pokémon FireRed and LeafGreen each have a v1.0 and a v1.1. You can determine which version you have by examining the numbers engraved on the cartridge's PCB.
- If the trailing digits are 20, it is v1.0.
- If the trailing digits are 30, it is v1.1.
Preparation
- A Pokémon that knows Knock Off
- Farfetch'd (じんすけ), obtainable via in-game trade, learns Knock Off at Lv. 21.
- A Pokémon that knows Recycle
- Mr. Mime (バリヤン), obtainable via in-game trade, learns Recycle at Lv. 33.
- A consumable item (e.g., a Berry)
- An Oran Berry, which activates at 50% HP or below, is ideal.
- Oran Berries can be obtained on Route 25.
- An Oran Berry, which activates at 50% HP or below, is ideal.
- Mail
- Can be purchased at the Celadon Department Store for 50 yen.
- Prepare at least 7 pieces.
Step 1: Prepare the Material Pokémon
The easiest way to obtain a material Pokémon is to use the Nidoran♂ (ニドくん) obtainable via the in-game trade in LeafGreen, with its experience adjusted to 466, 488, or 493. If any of the following apply to you, please refer to Detelony's explanation video or final's article.
- You are using FireRed.
- You already have ニドくん but it is difficult to adjust its experience to 466, 488, or 493.
- ニドくん has already evolved.
Note that since ニドくん obtained via the in-game trade has a personality value (PID) of 0x4C970B9E and a Trainer ID of 63184, it can be used as a material Pokémon by adjusting its experience to a different value.
Step 2: Mail Glitch
Prepare the following 3 Pokémon in your party, with the first 2 slots being Pokémon 1 and 2 below.
- Any Pokémon holding a consumable item.
- A Pokémon that knows Knock Off.
- A Pokémon that knows Recycle and is holding Mail (the message can be anything).
Start a Double Battle. It is recommended to save before starting. In the Double Battle, perform the following steps:
- Have the Pokémon use (consume) the consumable item.
- Once the item has been consumed, switch that Pokémon out for the Pokémon that knows Recycle and is holding Mail.
- Use Knock Off on the Recycle-user holding Mail to knock off its Mail.
- Use Recycle to recover the consumed item.
- End the battle.
Check your party. If the Pokémon that knows Recycle is no longer holding Mail, the Mail Glitch succeeded. Give the Recycle-user Mail again.
Step 3: Obtain the Glitch Pokémon
Place the material Pokémon obtained in Step 1 as the 1st Pokémon in Box 3, and fill your party with 6 Pokémon.
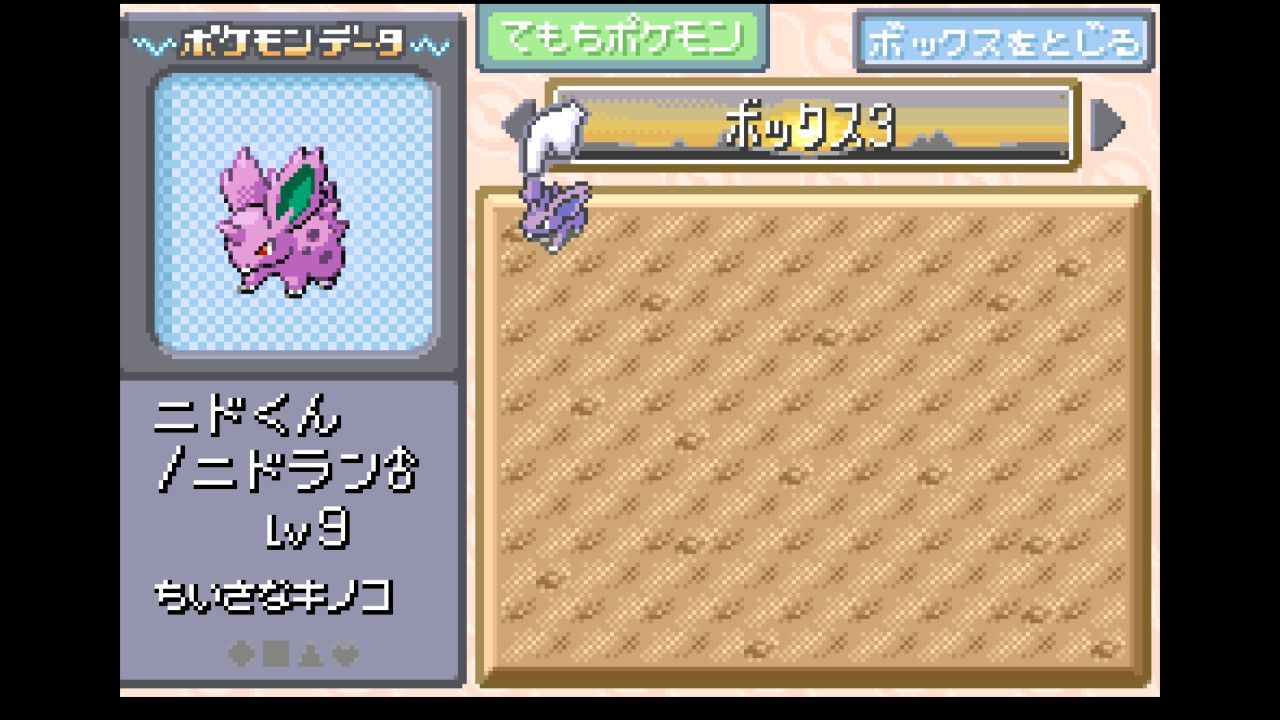
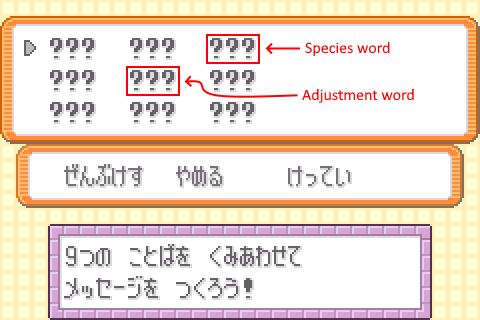
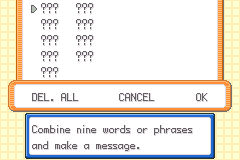
Give Mail to all 6 Pokémon (the message can be anything). When you attempt to give Mail to the 6th Pokémon, a Mail screen with ??? entered will be displayed.
If you are using LeafGreen and the material Pokémon is ニドくん, set the 3rd and 5th words of the Mail as shown below. The _____ entries in the table mean to delete the ????? word.
| Experience | 3rd word | 5th word |
|---|---|---|
| 466 | ポケモンゲット | _____ |
| 488 | レッド | _____ |
| 493 | レベル | _____ |
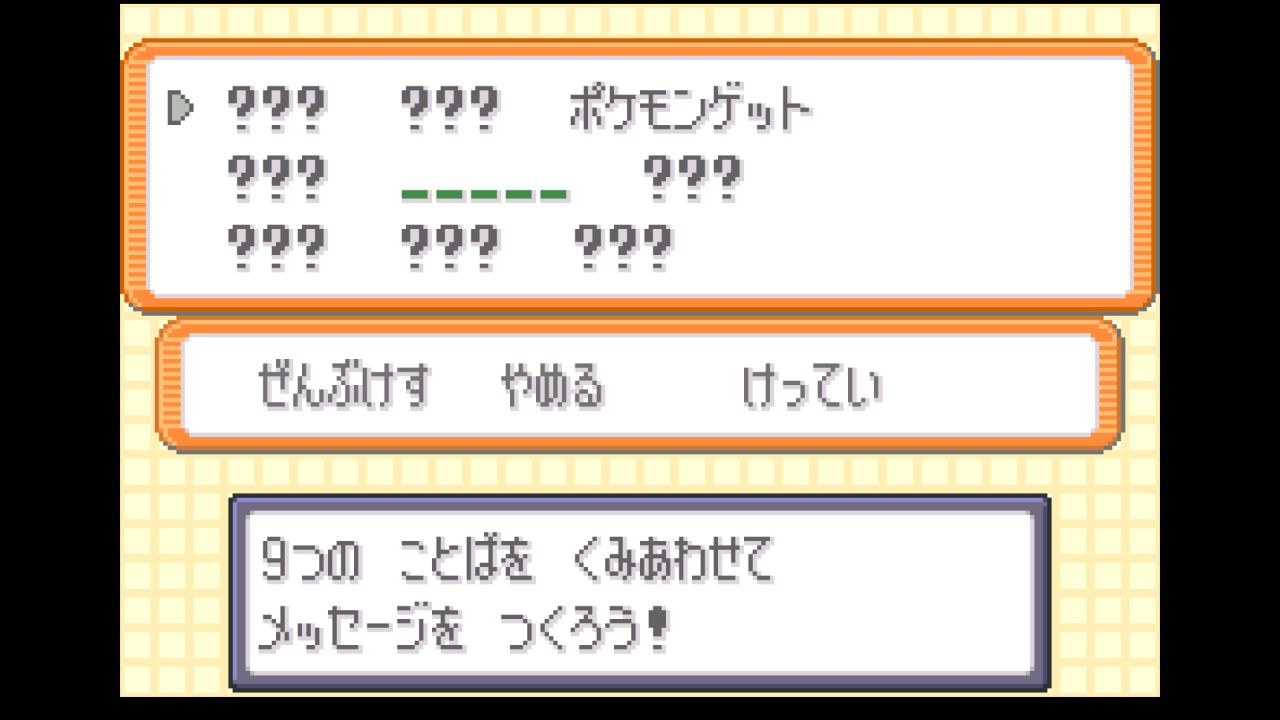
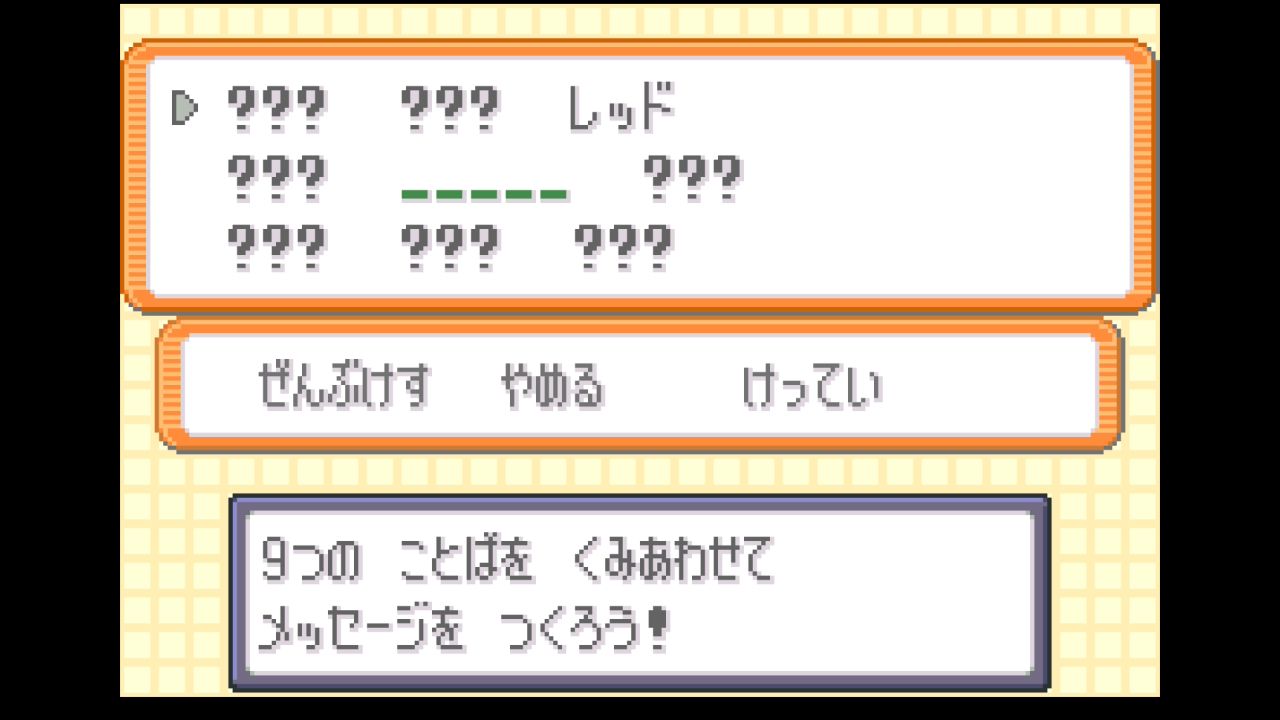
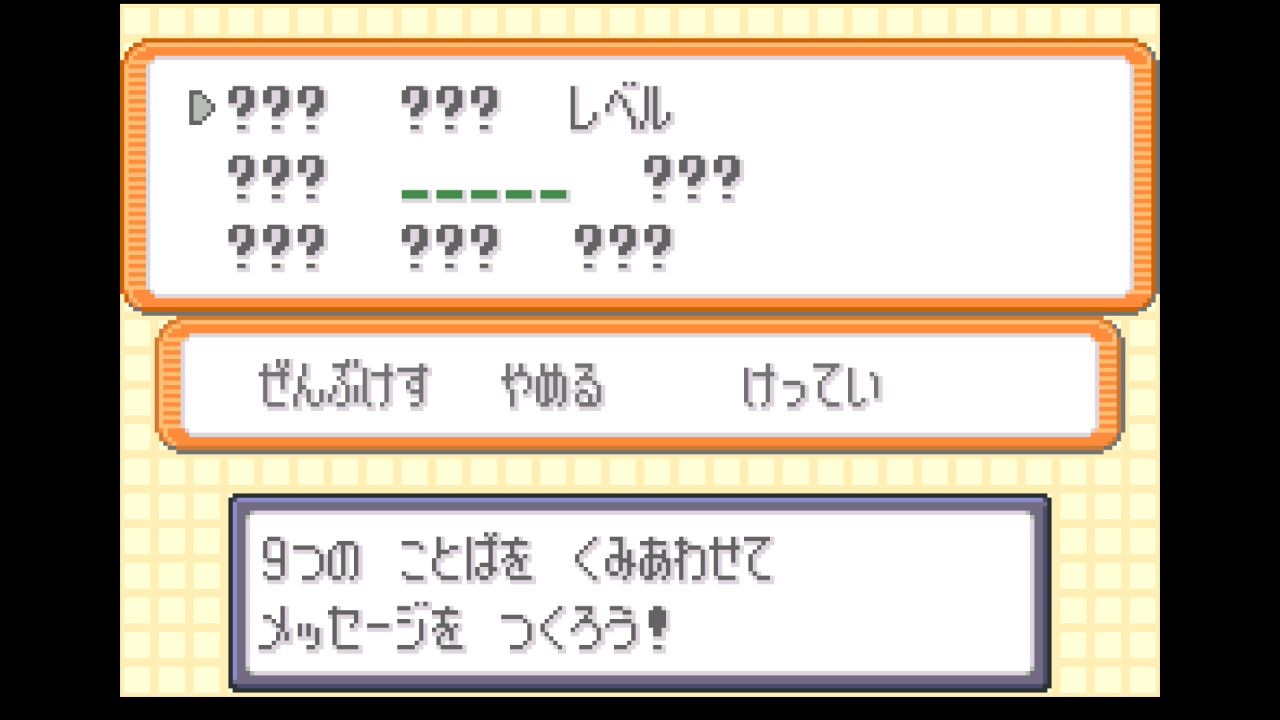
If you are using FireRed or a different material Pokémon, please use Detelony's FRLG ACE Glitch Pokémon Generation Calculator, or final's Species Word Finder and Checksum Adjustment Calculator.

Step 4: Obtain the Glitch Pokémon for Arbitrary Code Execution
Keep only 1 Pokémon in your party, and empty Boxes 12 through 14. Set the names of Boxes 1 through 5 as follows.
GBA
Box 1:  [リび…oく ゼn]
Box 2:  [ …tま 1tほ]
Box 3:  [ぁm  あい]
Box 4:  [アクぢいいN]
Box 5:  [O]
Switch
Box 1:  [リび…oく ゼn]
Box 2:  [ …tま 1tほ]
Box 3:  [ぁm  あい]
Box 4:  [アエぢいいN]
Box 5:  [O]
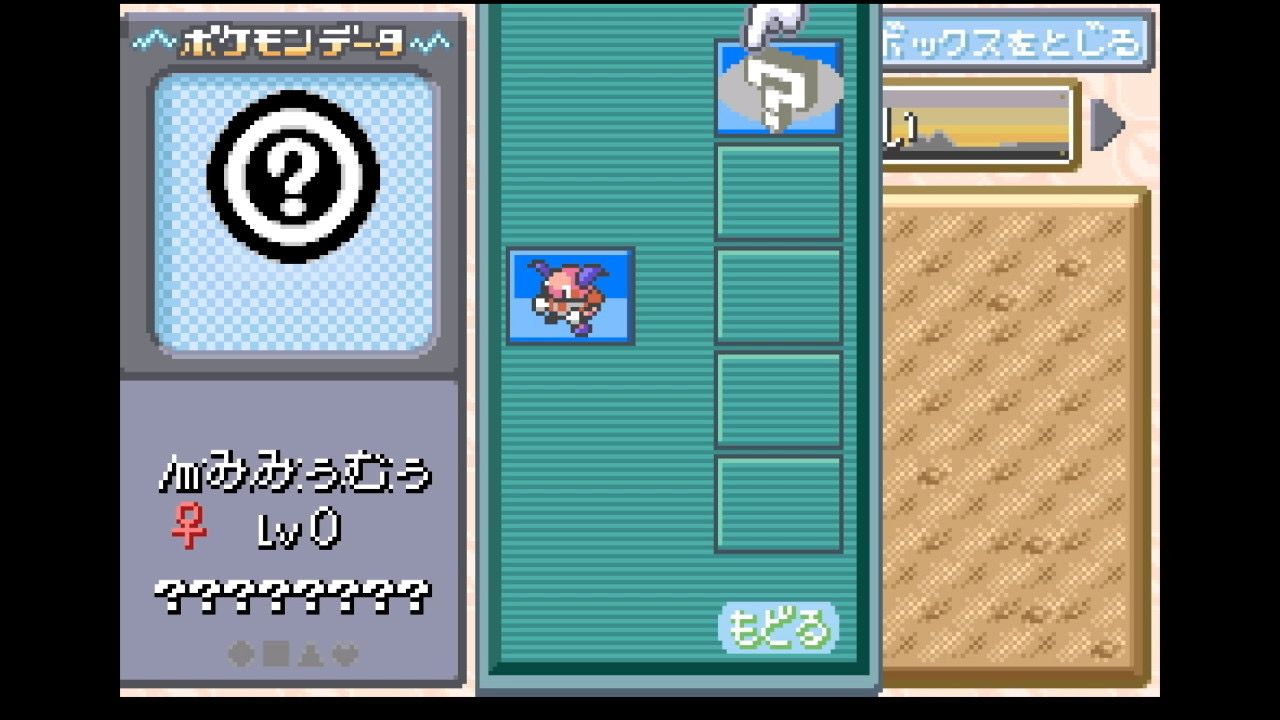
Open the "Move Pokémon" menu, pick up any Pokémon, move it onto the Glitch Pokémon from Step 3, and swap them. A new Glitch Pokémon is generated as the 2nd Pokémon in your party.
FireRed
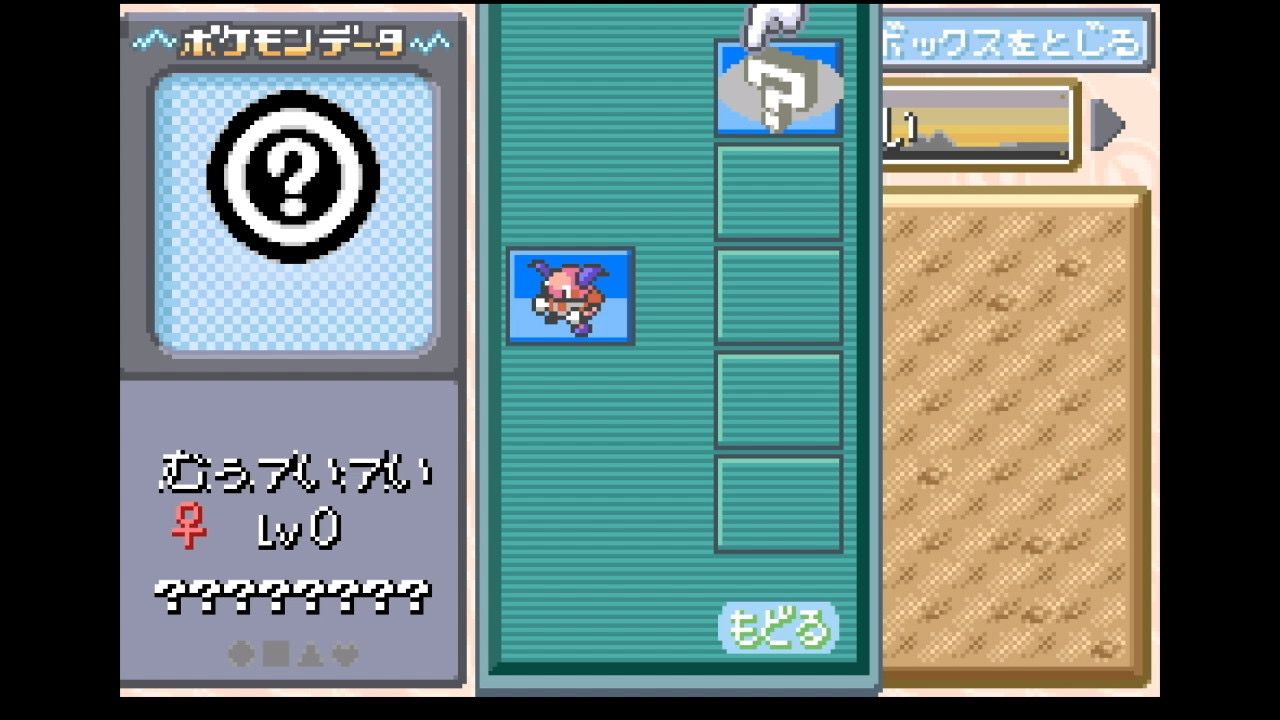
LeafGreen
Step 5: Create the Ursaring for Transfer
Empty the 16th slot of Box 1, and set the names of Boxes 1 through 14 as follows.
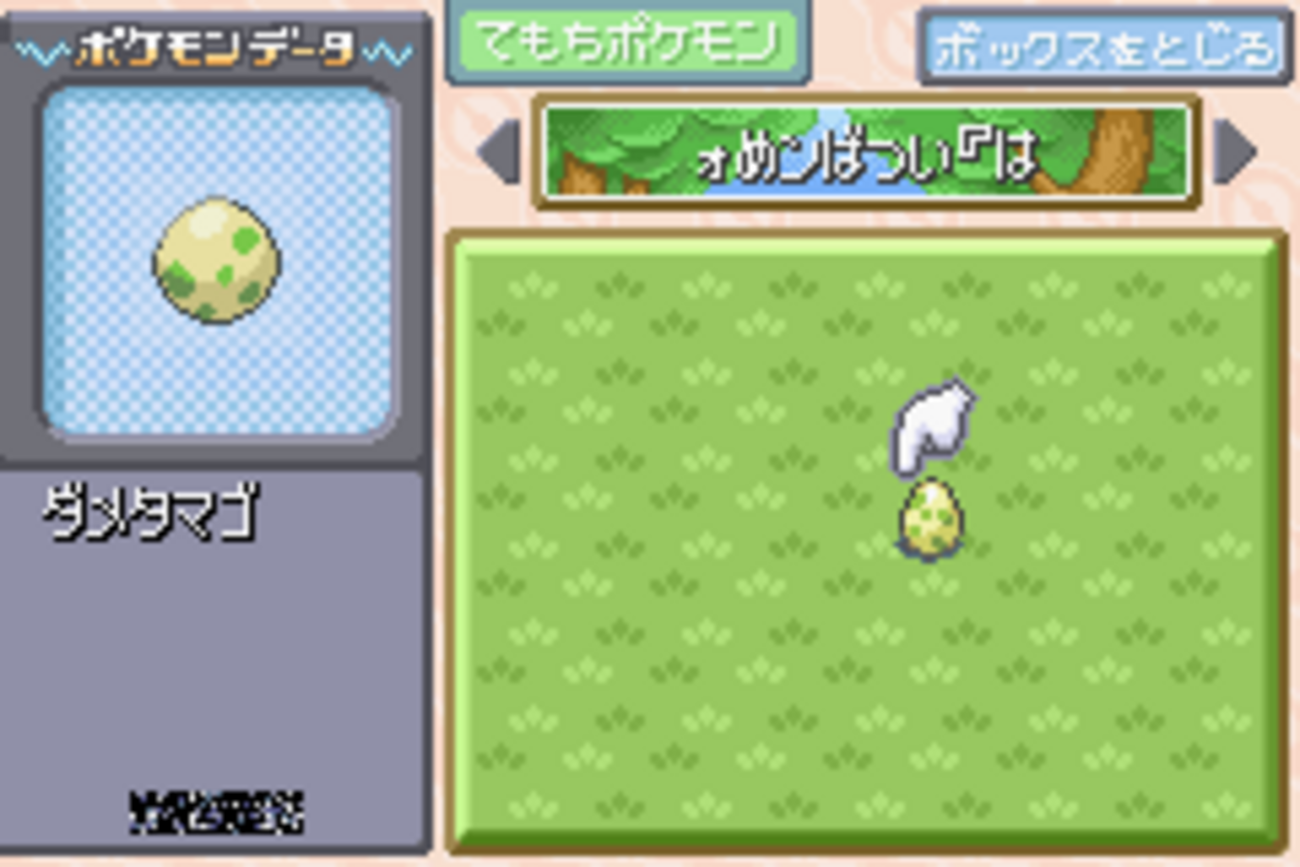
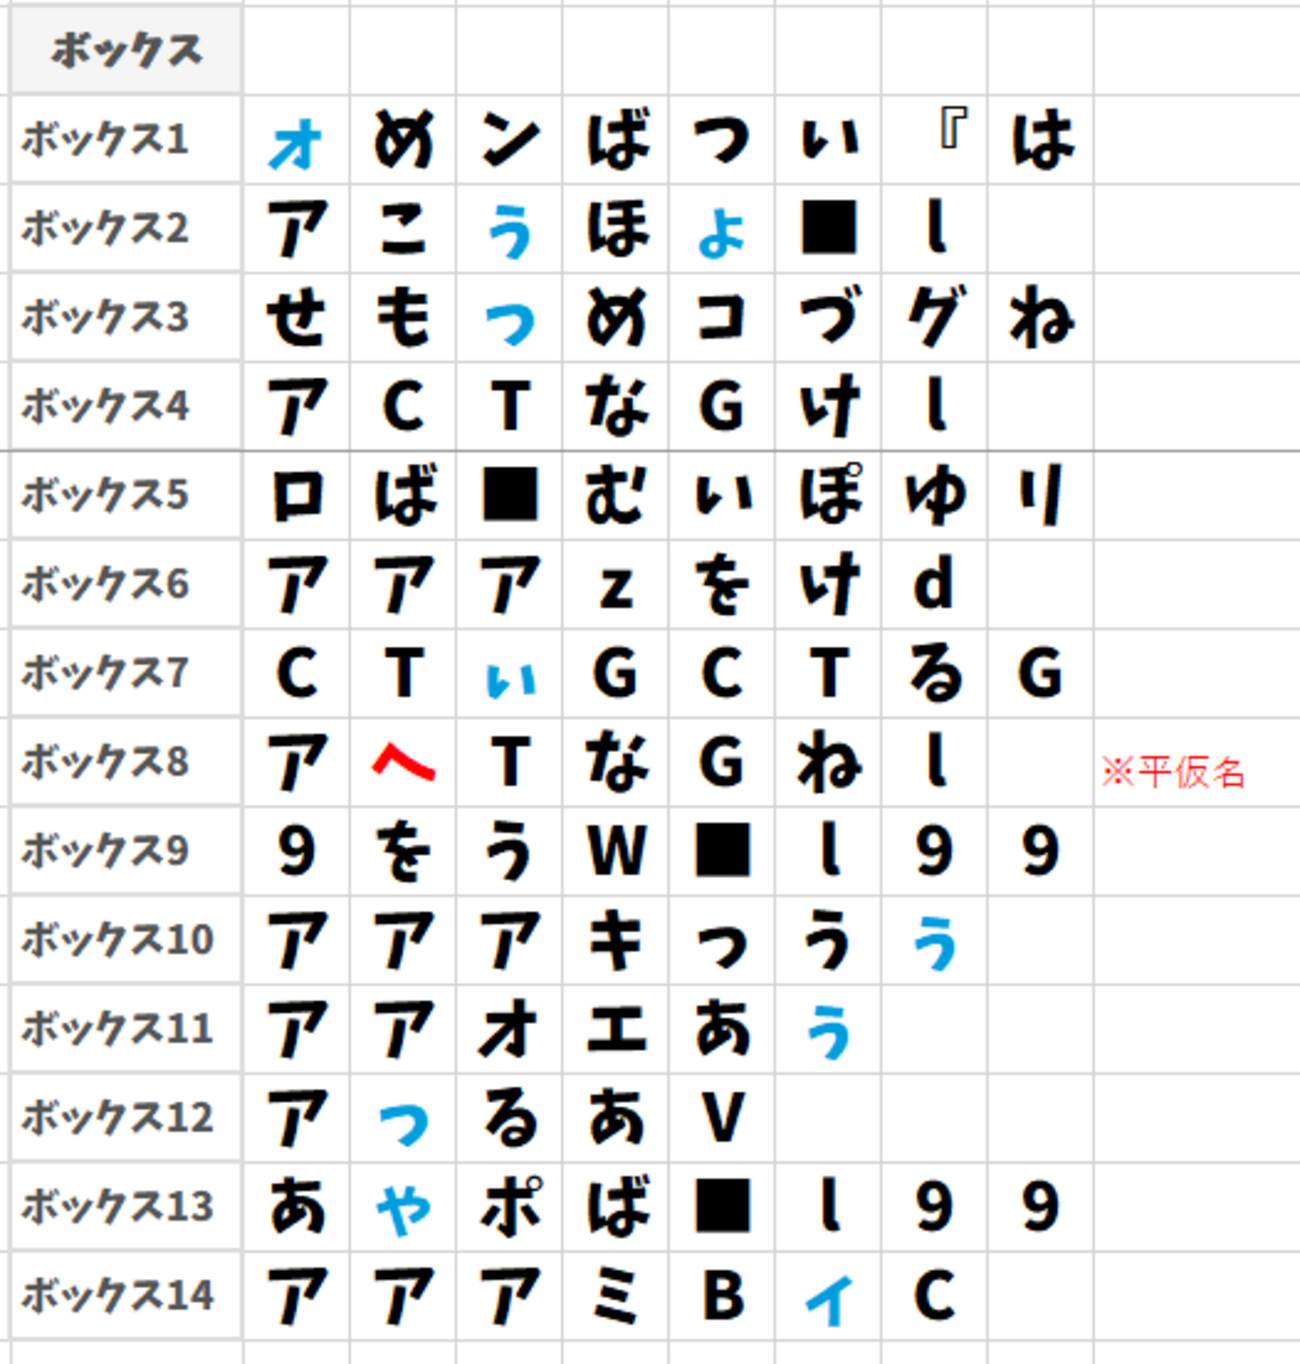
Box 1:  [ォめンばつい『は]
Box 2:  [アこぅほょ l]
Box 3:  [せもっめコづグね]
Box 4:  [アCTへGけl]
Box 5:  [うぽべはゆリあゃ]
Box 6:  [をさV9をうW]
Box 7:  [CTぃGCTるG]
Box 8:  [アざTざGこl]
Box 9:  [ l99キっうぅ]
Box 10: [アアアオエあぅ]
Box 11: [WsっるあW]
Box 12: [ア み Czs]
Box 13: [zs  ぺる  ]
Box 14: [が]
Pick up any normal Pokémon. Swap it with the Glitch Pokémon generated in Step 4 and then swap them back to the original arrangement. An Ursaring is generated in the 16th slot of Box 1.
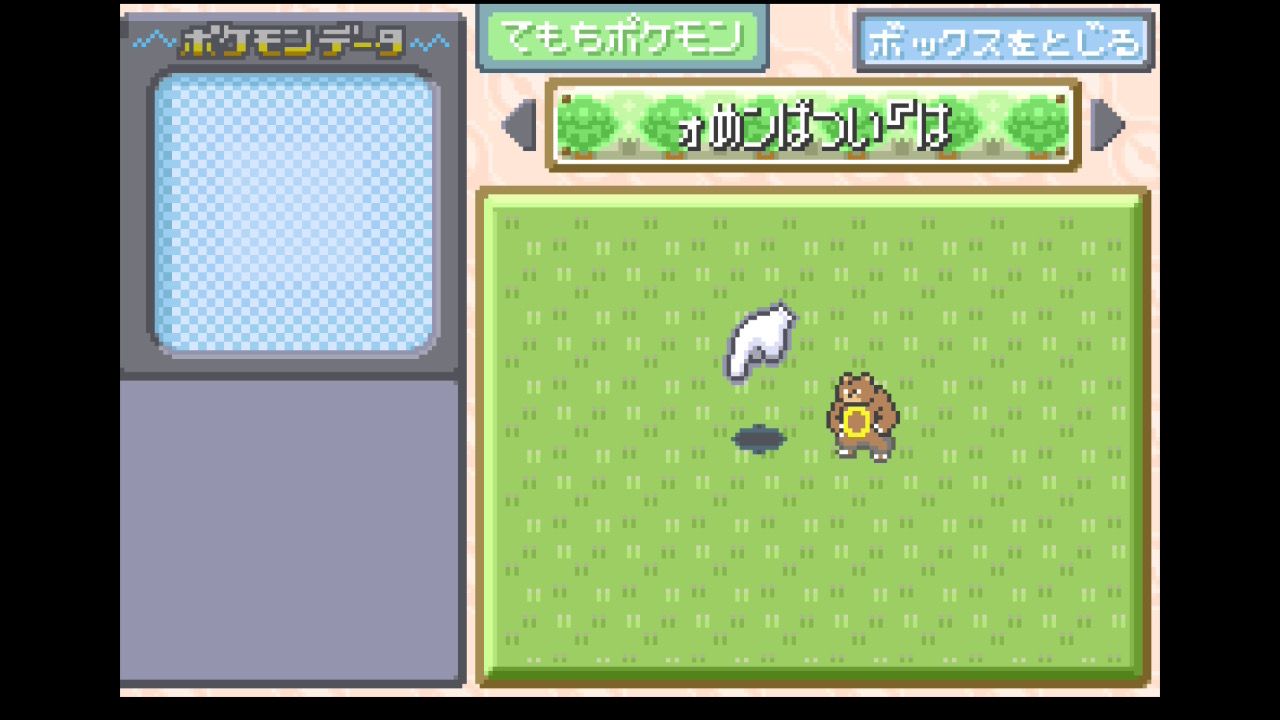
From now on, keep Boxes 12 through 14 empty, and do not change the position, nickname, or held item of the Ursaring or of the 3 Pokémon generated in Step 6.
Step 6: Simplified RAM Writer Setup
Set the names of Boxes 1 through 4 as follows, and do not change them until all 3 transfers are finished.
Box 1:  [ァらぜいっむは3]
Box 2:  [アoひぴざ l]
Box 3:  [めリあゃ みぼづ]
Box 4:  [アボねつはポば]
Set Boxes 5 through 14 starting from the 1st set, and perform the same swap as in Step 5 each time you enter a set.
Set 1: Transfer to the 17th Slot of Box 1
Box 5:  [あF♂あlどゥ ]
Box 6:  [ ぇ」お  よゅ]
Box 7:  [ぴ9/ゃァばチl]
Box 8:  [ゃぶぅう!ス l]
Box 9:  [yぶOねきもぁぴ]
Box 10: [ァばカlうぎ む]
Box 11: [あミろぴゥゃゥゃ]
Box 12: [あむァばぴlゾざ]
Box 13: [ むァばぶl ら]
Box 14: [おkなぶ リ]
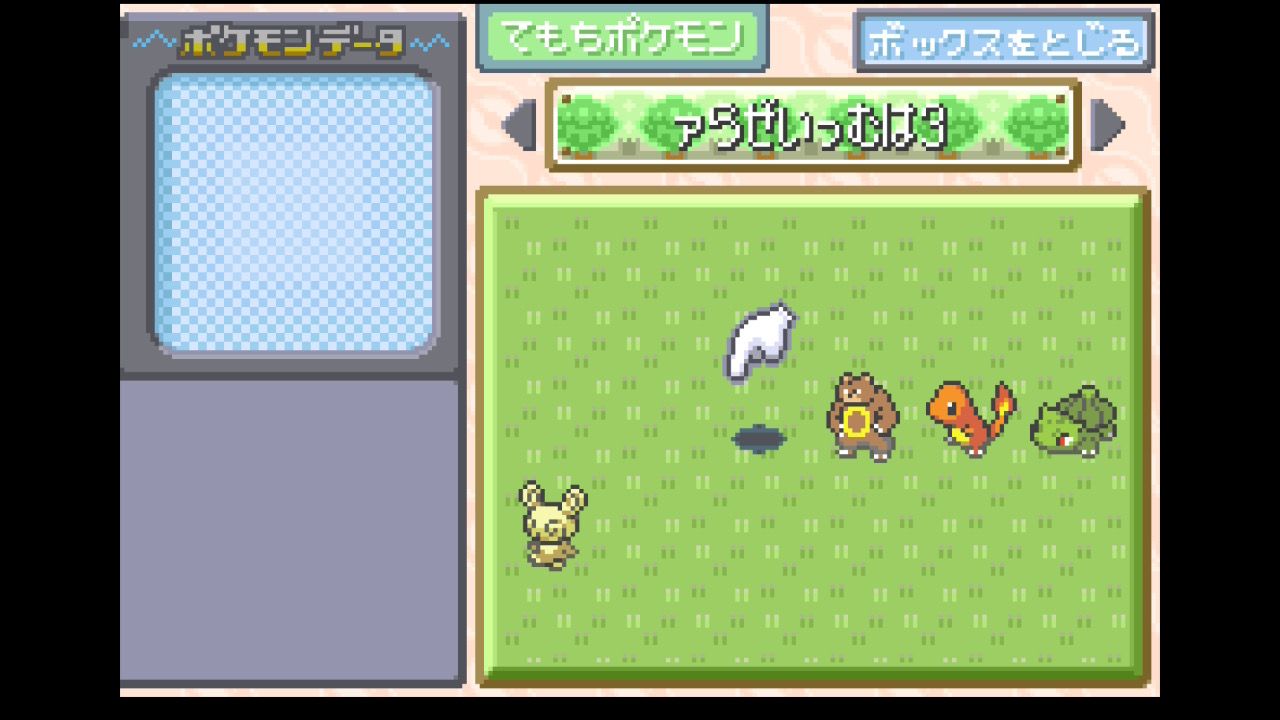
Perform the swap. Once a Charmander is generated in the 17th slot of Box 1, proceed to the 2nd set.
Set 2: Transfer to the 18th Slot of Box 1
Box 5:  [いいlィィう  ]
Box 6:  [ぞぐ き ゥづゅ]
Box 7:  [V9ぶほくぢぃW]
Box 8:  [えめあげべく l]
Box 9:  [アMよYあれせe]
Box 10: [と2ベシィぐあれ] (katakana ベ)
Box 11: [うh7スぞね7オ]
Box 12: [LsミねIけうろ] (uppercase I)
Box 13: [fXか Fsに ]
Box 14: [いぶあギあぅ]
Perform the swap. Once a Bulbasaur is generated in the 18th slot of Box 1, proceed to the 3rd set.
Set 3: Transfer to the 19th Slot of Box 1
Box 5:  [ういlあ ぃあ ]
Box 6:  [えグおしWすぴB]
Box 7:  [ゃ9♀ゃあむァば]
Box 8:  [せl んこVかl]
Box 9:  [〇〇Xsusゥァ]
Box 10: [ミゾCsァゥフふ]
Box 11: [ァばうlぇBFC]
Box 12: [ みいめあがDば]
Box 13: [みび**そく##]
Box 14: [ くギふいい]
Replace 〇〇, **, and ## with the characters in the table below based on your version.
| Version | 〇〇 | ** | ## |
|---|---|---|---|
| GBA FireRed v1.0 | jえ | づン | ドゲ |
| GBA FireRed v1.1 | せお | ガン | あゲ |
| Switch FireRed | ズゴ | o♀ | 4K |
| GBA LeafGreen v1.0 | よお | ひン | ドゲ |
| GBA LeafGreen v1.1 | カお | ソン | あゲ |
| Switch LeafGreen | bゴ | A♀ | 4K |
Perform the swap. The setup is complete once a Spinda is generated in the 19th slot of Box 1.
Step 7: Start the Simplified RAM Writer
Set the names of Boxes 1 through 14 as follows.
Box 1:  [ァらぜいは3oひ]
Box 2:  [アぴざねぼ l]
Box 3:  [にべにぶあぃくタ]
Box 4:  [アポばアアアアア]
Box 5:  [そべぶネしぼゾぢ]
Box 6:  [てWしぱねリいり]
Box 7:  [そWレぉレぉねリ]
Box 8:  [ りこWィげこタ]
Box 9:  [えべくネくぼィね]
Box 10: [えぅけネきぼグね]
Box 11: [くびミび〇〇 う]
Box 12: [**おく7@ う]
Box 13: [## う%ベうい] (katakana ベ)
Box 14: [ブし  おお  ]
Replace 〇〇, **, @, ##, and % with the characters in the table below based on your version.
| Version | 〇〇 | ** | @ | ## | % |
|---|---|---|---|---|---|
| GBA v1.0 | ぴっ | ユセ | せ | ぃぅ | … |
| GBA v1.1 | ?ぽ | アセ | せ | ゾぃ | … |
| Switch | ざぢ | ュバ | そ | lめ | ? |
Perform the same swap as in Step 5, then close all PC menus to start the simplified RAM Writer.
Simplified RAM Writer
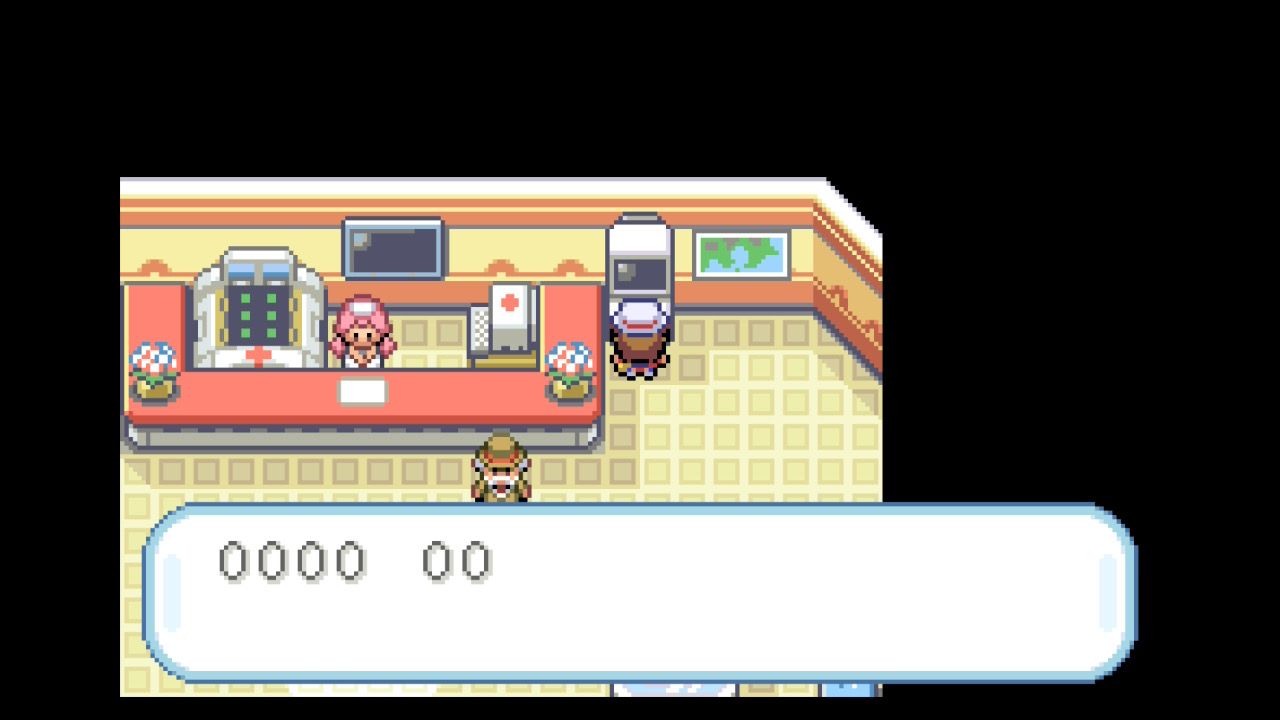
The 4 digits on the left are the input position, and the 2 digits on the right are its value.
B: Input position -01
A: Input position +01
↑: Value -01
↓: Value +01
←: Value -10
→: Value +10
START: Exit
SELECT: Execute code from input position 0000 (be careful not to press this until you have entered the program)
Step 8: RAM Writer Setup
Use the simplified RAM Writer to input the RAM Writer program. Once input is complete, you can start the RAM Writer by pressing the Select button. It is recommended to press the Start button to exit the simplified RAM Writer and save before starting the RAM Writer.
| Input position | Value |
|---|---|
| 0000 | F8 |
| 0001 | B5 |
| 0002 | 4B |
| 0003 | A0 |
| 0004 | 4D |
| 0005 | 4C |
| 0006 | 00 |
| 0007 | F0 |
| 0008 | 1E |
| 0009 | F8 |
| 000A | FF |
| 000B | 28 |
| 000C | 2D |
| 000D | D0 |
| 000E | 50 |
| 000F | 4D |
| 0010 | 28 |
| 0011 | 72 |
| 0012 | 11 |
| 0013 | 21 |
| 0014 | 4A |
| 0015 | 4C |
| 0016 | 00 |
| 0017 | F0 |
| 0018 | 16 |
| 0019 | F8 |
| 001A | 45 |
| 001B | A0 |
| 001C | 52 |
| 001D | A2 |
| 001E | 04 |
| 001F | 23 |
| 0020 | 00 |
| 0021 | F0 |
| 0022 | 09 |
| 0023 | F8 |
| 0024 | 08 |
| 0025 | 30 |
| 0026 | 0C |
| 0027 | 23 |
| 0028 | 00 |
| 0029 | F0 |
| 002A | 05 |
| 002B | F8 |
| 002C | 02 |
| 002D | 20 |
| 002E | 00 |
| 002F | 06 |
| 0030 | 68 |
| 0031 | 71 |
| 0032 | 28 |
| 0033 | 60 |
| 0034 | 44 |
| 0035 | E0 |
| 0036 | 00 |
| 0037 | 21 |
| 0038 | 07 |
| 0039 | B5 |
| 003A | 28 |
| 003B | 7A |
| 003C | 00 |
| 003D | 22 |
| 003E | 41 |
| 003F | 4C |
| 0040 | 00 |
| 0041 | F0 |
| 0042 | 01 |
| 0043 | F8 |
| 0044 | 07 |
| 0045 | BD |
| 0046 | 20 |
| 0047 | 47 |
| 0048 | 05 |
| 0049 | DF |
| 004A | 3F |
| 004B | 4C |
| 004C | FF |
| 004D | F7 |
| 004E | FB |
| 004F | FF |
| 0050 | 3E |
| 0051 | 4B |
| 0052 | 1B |
| 0053 | 88 |
| 0054 | 19 |
| 0055 | 07 |
| 0056 | 09 |
| 0057 | D5 |
| 0058 | 28 |
| 0059 | 7A |
| 005A | 41 |
| 005B | 4C |
| 005C | FF |
| 005D | F7 |
| 005E | F3 |
| 005F | FF |
| 0060 | 00 |
| 0061 | 20 |
| 0062 | 40 |
| 0063 | 4C |
| 0064 | FF |
| 0065 | F7 |
| 0066 | EF |
| 0067 | FF |
| 0068 | 00 |
| 0069 | 20 |
| 006A | F8 |
| 006B | BD |
| 006C | 6F |
| 006D | 79 |
| 006E | E8 |
| 006F | 79 |
| 0070 | 39 |
| 0071 | 1F |
| 0072 | 01 |
| 0073 | D0 |
| 0074 | 28 |
| 0075 | 68 |
| 0076 | 79 |
| 0077 | 1C |
| 0078 | 04 |
| 0079 | 2B |
| 007A | 07 |
| 007B | D8 |
| 007C | 00 |
| 007D | 2B |
| 007E | 1C |
| 007F | D0 |
| 0080 | E9 |
| 0081 | 79 |
| 0082 | 28 |
| 0083 | 68 |
| 0084 | 01 |
| 0085 | 70 |
| 0086 | 99 |
| 0087 | 08 |
| 0088 | 40 |
| 0089 | 18 |
| 008A | 18 |
| 008B | E0 |
| 008C | 20 |
| 008D | 2B |
| 008E | 08 |
| 008F | D8 |
| 0090 | 02 |
| 0091 | D0 |
| 0092 | 38 |
| 0093 | 1F |
| 0094 | 03 |
| 0095 | D0 |
| 0096 | 01 |
| 0097 | E0 |
| 0098 | 78 |
| 0099 | 1E |
| 009A | 00 |
| 009B | D5 |
| 009C | 05 |
| 009D | 30 |
| 009E | 68 |
| 009F | 71 |
| 00A0 | 10 |
| 00A1 | E0 |
| 00A2 | C9 |
| 00A3 | 00 |
| 00A4 | 01 |
| 00A5 | 22 |
| 00A6 | CA |
| 00A7 | 41 |
| 00A8 | 19 |
| 00A9 | 0A |
| 00AA | 02 |
| 00AB | D0 |
| 00AC | 12 |
| 00AD | 01 |
| 00AE | 02 |
| 00AF | 29 |
| 00B0 | 01 |
| 00B1 | D0 |
| 00B2 | 40 |
| 00B3 | 2B |
| 00B4 | 00 |
| 00B5 | D1 |
| 00B6 | 52 |
| 00B7 | 42 |
| 00B8 | 80 |
| 00B9 | 18 |
| 00BA | 04 |
| 00BB | 2F |
| 00BC | 01 |
| 00BD | D0 |
| 00BE | 28 |
| 00BF | 60 |
| 00C0 | 00 |
| 00C1 | 78 |
| 00C2 | E8 |
| 00C3 | 71 |
| 00C4 | 24 |
| 00C5 | 49 |
| 00C6 | 8C |
| 00C7 | 1C |
| 00C8 | 24 |
| 00C9 | 4B |
| 00CA | 22 |
| 00CB | 48 |
| 00CC | 86 |
| 00CD | 1C |
| 00CE | 15 |
| 00CF | 22 |
| 00D0 | 01 |
| 00D1 | 80 |
| 00D2 | 04 |
| 00D3 | 83 |
| 00D4 | 43 |
| 00D5 | 82 |
| 00D6 | 40 |
| 00D7 | 30 |
| 00D8 | 01 |
| 00D9 | 3A |
| 00DA | F9 |
| 00DB | D1 |
| 00DC | 14 |
| 00DD | 27 |
| 00DE | 2B |
| 00DF | 68 |
| 00E0 | D8 |
| 00E1 | 1B |
| 00E2 | 0B |
| 00E3 | 30 |
| 00E4 | 6B |
| 00E5 | 79 |
| 00E6 | 03 |
| 00E7 | 21 |
| 00E8 | 4B |
| 00E9 | 40 |
| 00EA | 0B |
| 00EB | 2F |
| 00EC | 00 |
| 00ED | D0 |
| 00EE | 06 |
| 00EF | 23 |
| 00F0 | 1C |
| 00F1 | 24 |
| 00F2 | 00 |
| 00F3 | F0 |
| 00F4 | 0D |
| 00F5 | F8 |
| 00F6 | 02 |
| 00F7 | 36 |
| 00F8 | 00 |
| 00F9 | 78 |
| 00FA | 0B |
| 00FB | 2F |
| 00FC | 00 |
| 00FD | D1 |
| 00FE | E8 |
| 00FF | 79 |
| 0100 | 07 |
| 0101 | 3B |
| 0102 | 04 |
| 0103 | 24 |
| 0104 | 00 |
| 0105 | F0 |
| 0106 | 04 |
| 0107 | F8 |
| 0108 | 2A |
| 0109 | 36 |
| 010A | 01 |
| 010B | 3F |
| 010C | E7 |
| 010D | D1 |
| 010E | 9B |
| 010F | E7 |
| 0110 | 01 |
| 0111 | 00 |
| 0112 | E1 |
| 0113 | 40 |
| 0114 | 09 |
| 0115 | 07 |
| 0116 | 09 |
| 0117 | 0F |
| 0118 | E2 |
| 0119 | 08 |
| 011A | 9A |
| 011B | 42 |
| 011C | 00 |
| 011D | D1 |
| 011E | 11 |
| 011F | 31 |
| 0120 | 0E |
| 0121 | 4A |
| 0122 | 51 |
| 0123 | 18 |
| 0124 | 01 |
| 0125 | 31 |
| 0126 | 31 |
| 0127 | 80 |
| 0128 | 02 |
| 0129 | 36 |
| 012A | 04 |
| 012B | 3C |
| 012C | F0 |
| 012D | D5 |
| 012E | 70 |
| 012F | 47 |
| 0130 | 00 |
| 0131 | 02 |
| 0132 | 03 |
| 0133 | 11 |
| 0134 | 03 |
| 0135 | 0F |
| 0136 | 8F |
| 0137 | 00 |
| 0138 | 00 |
| 0139 | 04 |
| 013A | 05 |
| 013B | 00 |
| 013C | GBA v1.0: 05 GBA v1.1: 71 Switch: 6D |
| 013D | GBA v1.0: 50 GBA v1.1: 4F Switch: 4F |
| 013E | 00 |
| 013F | 08 |
| 0140 | GBA v1.0: 29 GBA v1.1: 95 Switch: 91 |
| 0141 | GBA v1.0: 44 GBA v1.1: 43 Switch: 43 |
| 0142 | 00 |
| 0143 | 08 |
| 0144 | FR GBA v1.0: 25 FR GBA v1.1: 75 FR Switch: 19 LG GBA v1.0: FD LG GBA v1.1: 4D LG Switch: F1 |
| 0145 | FR GBA v1.0: ED FR GBA v1.1: EC FR Switch: 29 LG GBA v1.0: EC LG GBA v1.1: EC LG Switch: 28 |
| 0146 | GBA: 12 Switch: 13 |
| 0147 | 08 |
| 0148 | GBA v1.0: E9 GBA v1.1: E5 Switch: E1 |
| 0149 | 05 |
| 014A | 00 |
| 014B | 08 |
| 014C | GBA v1.0: 60 GBA v1.1: C0 Switch: 10 |
| 014D | GBA v1.0: 31 GBA v1.1: 30 Switch: 23 |
| 014E | 00 |
| 014F | 03 |
| 0150 | GBA: B0 Switch: AC |
| 0151 | 9B |
| 0152 | 03 |
| 0153 | 02 |
| 0154 | 22 |
| 0155 | F8 |
| 0156 | 00 |
| 0157 | 06 |
| 0158 | 17 |
| 0159 | E2 |
| 015A | 00 |
| 015B | 00 |
| 015C | 9F |
| 015D | F0 |
| 015E | 00 |
| 015F | 00 |
| 0160 | GBA v1.0: 09 GBA v1.1: 75 Switch: 71 |
| 0161 | GBA v1.0: 3E GBA v1.1: 3D Switch: 3D |
| 0162 | 00 |
| 0163 | 08 |
| 0164 | GBA v1.0: BD GBA v1.1: B9 Switch: B5 |
| 0165 | 20 |
| 0166 | 00 |
| 0167 | 08 |
| 0168 | A1 |
| 0169 | A2 |
| 016A | A3 |
| 016B | A4 |
| 016C | A5 |
| 016D | A6 |
| 016E | A7 |
| 016F | A8 |
| 0170 | A9 |
| 0171 | AA |
| 0172 | BB |
| 0173 | BC |
| 0174 | BD |
| 0175 | BE |
| 0176 | BF |
| 0177 | C0 |
| 0178 | FF |
| 0179 | 00 |
| 017A | 00 |
| 017B | 00 |
| 017C | 00 |
| 017D | 00 |
| 017E | 00 |
| 017F | 00 |
RAM Writer
From now on, you can start the RAM Writer each time you start the simplified RAM Writer and press the Select button.
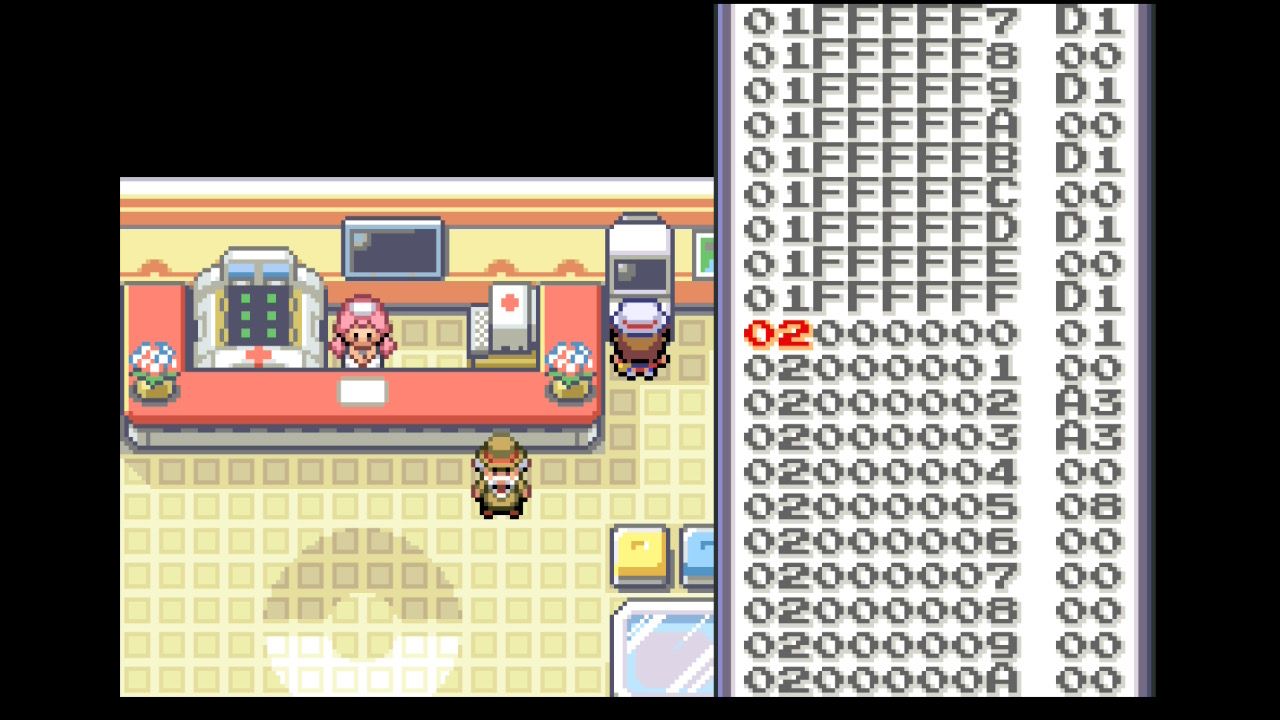
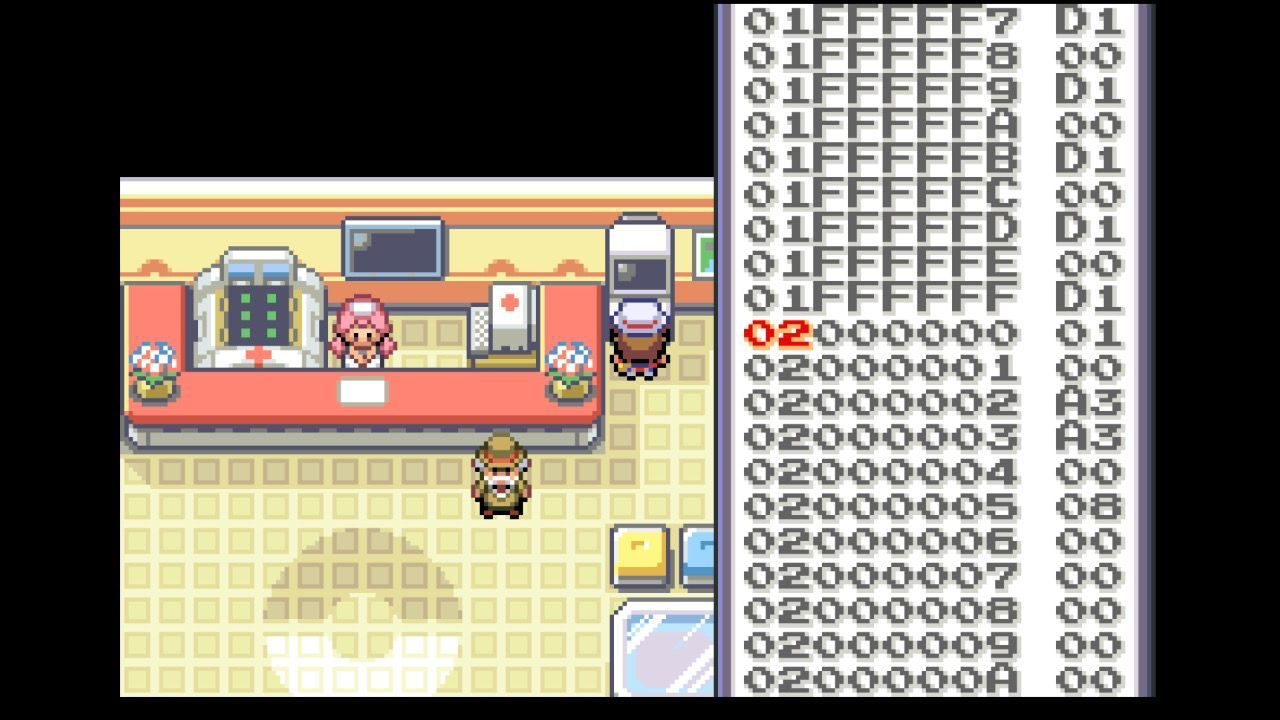
The 8 digits on the left are the memory address, and the 2 digits on the right are its value. Select the 2 digits shown in red with Left and Right, and change them with Up, Down, L, and R.
←: Move the selection left
→: Move the selection right
↑: Selected 2 digits -01
↓: Selected 2 digits +01
L: Selected 2 digits -10
R: Selected 2 digits +10
A: Write the displayed value to the current address
B: Write the displayed value to the current address
SELECT: Write the value and advance the address by +01
START: Exit and return to the game
Starting the Full Version Directly
Change the names of both Box 10 and Box 14 to the following.
Box 10: [ ぅけネきぼグね]
Box 14: [ブし  ベし  ] (katakana ベ)
Perform the same swap as in Step 5 and close the PC to start the full version of the RAM Writer directly.
Advanced: Rewriting the Box Names with the Full Version
This method uses the full version to rewrite 3 bytes and change the box names to the ones for starting it directly.
Read the 4 bytes starting at the following address and reverse their order to get the start address of the box data.
| Version | Address to start reading 4 bytes |
|---|---|
| GBA v1.0 | 03005050 |
| GBA v1.1 | 03004FB0 |
| Switch | 03004240 |
For example, if B0 92 02 02 is displayed, the start address is 020292B0. Add the values in the table below to the start address in hexadecimal to get the addresses to rewrite.
| Part to rewrite | Value to add | Before | After |
|---|---|---|---|
| 1st character of Box 10 | 00008395 | 04 | 00 |
| 5th character of Box 14 | 000083BD | 05 | 99 |
| 6th character of Box 14 | 000083BE | 05 | 0C |
If the start address is 020292B0, the addresses are as follows.
| Part to rewrite | Calculation | Address to rewrite |
|---|---|---|
| 1st character of Box 10 | 020292B0 + 00008395 | 02031645 |
| 5th character of Box 14 | 020292B0 + 000083BD | 0203166D |
| 6th character of Box 14 | 020292B0 + 000083BE | 0203166E |
The start address changes when you enter or leave the PC or restart the game, so read it again every time. Check that all 3 calculated addresses match the "Before" values, then write the "After" values one at a time with A or B. If they do not match, do not change anything.
Perform the same swap as in Step 5 and close the PC to start the full version of the RAM Writer directly.
References
For the arbitrary code execution procedure, the following are referenced in addition to the resources mentioned in Step 1.
For the RAM Writer, the following are referenced.